Author Archives: cityfoodcountrykitchen

This Ice Cream is Bananas!

Banana Ice Cream

I absolutely love the flavor of a perfectly ripe banana atop an ice cream sundae or in a milkshake, but I had never tried making banana ice cream.  I thought a cornstarch based ice cream would be perfect to let the banana flavor really shine through, but I couldn’t find the right recipe.  I often start with Mark Bittman’s cornstarch ice cream recipe as a base, so that’s where I began with this, but tweaked it to incorporate the wonderful flavor of ripe bananas.  This tastes great as is, but I also enjoyed it with a heavy dose of cinnamon and several tablespoons of bourbon in a recent batch.

Eggless Banana Ice Cream

  • 3 Medium Bananas (eating ripeness; not overripe)
  • 1 T. Pure Vanilla
  • 3 oz. Cream Cheese
  • 1/4 cup Pure Maple Syrup
  • 2 1/2 cups Half & Half
  • 1/4 cup White Sugar
  • 1/4 cup Brown Sugar
  • pinch Kosher Salt
  • 3 T. Cornstarch

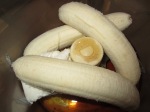
First, add bananas, vanilla, cream cheese, and maple syrup to food processor and puree until smooth.

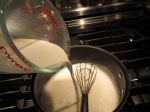
Then, put 2 cups of the half & half into a saucepan over medium heat.  Add sugars and salt, then stir.  In the meantime, combine the remaining 1/2 cup of half & half with cornstarch and stir until smooth.  Once the half & half and sugar mixture is hot, pour in cornstarch mixture and whisk constantly for 3-4 minutes until the mixture is smooth and thick.  Turn off heat and whisk in pureed banana mixture.

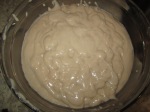
Once combined, force the mixture through a sieve and refrigerate until cold before processing in your ice cream maker.

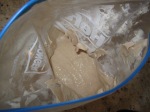
To speed up the cooling process, you can add the ice cream base to a gallon size bag and either put it in an ice bath or freeze it for about an hour.  If you do put the bag into the freezer, just be sure not to forget about it!

I was impressed with how this turned out and am happy to share it with you.  This will be a go-to at our house.  While still indulgent, the bananas and absence of eggs make this slightly lighter than most homemade ice cream recipes.   As you can see, I served this with some graham crackers, pecans, and dark chocolate in the featured photo. This combination was great, but I am thinking some fresh sliced strawberries will be my next topping for this tasty frozen treat!

Wee Bit Lighter Scottish Scones


I really like scones, but whenever I look up recipes to make them I find myself turned off by the high butter content combined with the regular use of heavy cream. This was my attempt to make a scone that is just a tad lighter without sacrificing taste or texture…but please note they are still not a low-fat food.  I also like this recipe because I pretty much always have the items on hand to make a batch.

Wee Bit Lighter Scottish Scones (makes 8 scones)

  • 1 cup all-purpose flour
  • 1 cup oatmeal
  • 2 tablespoons white sugar
  • 2 tablespoons brown sugar
  • 4 teaspoons baking powder
  • 1/8 teaspoon salt
  • 1/2 cup dried fruit (I used sour cherries in the pictured batch)
  • 4 tablespoons cold salted butter (cut into 4 pieces)
  • 1 egg
  • 1/2 cup light sour cream
  • 1/4 cup skim milk
  • 2 teaspoons extract of your choice (I like a half and half mixture of almond and orange extracts to compliment the cherries.  You could also add in some fruit zest and reduce the extract amount to taste.)

Pre-heat oven to 400 degrees and line a baking sheet with parchment paper.

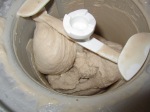
In a food processor, pulse together the flour, oatmeal, sugars, salt, dried cherries, and butter until mixture resembles crumbs as pictured.

In another bowl, beat egg.  Then add sour cream, milk, and extracts until well blended. Using a fork, slowly add dry mixture into wet mixture until just combined. Do not over mix.

Using a 1/4 cup ice cream scoop (or measuring cup) drop dough onto parchment lined baking sheet.  Press down onto top of scones with fork to flatten slightly.  Let them rest for about 5-10 minutes before putting in the oven.

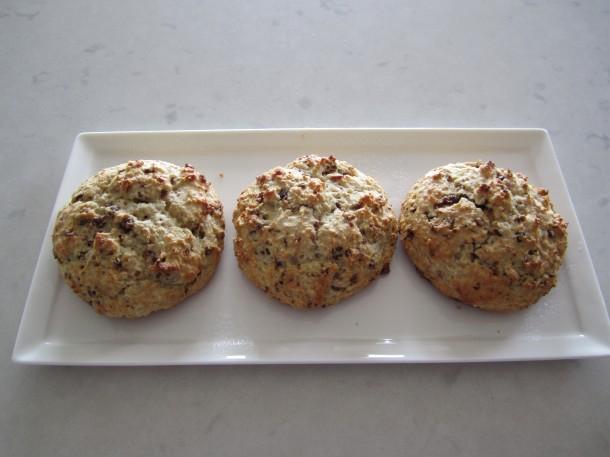
Bake for about 13-16 minutes.  The tops of the scones will be light brown with bits of golden brown showing on top. The bottoms will be golden brown.  Transfer scones to serving dish and enjoy!
A Perfect Party Bite for your New Year’s Celebration

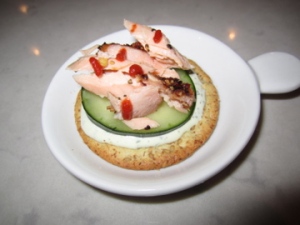
Smoke Salmon BitesWith the New Year upon us, I thought sharing an easy appetizer was in order.  A killer cheese plate and spinach artichoke dip are my go to starters for parties, but I also love to serve something just a little bit lighter on its feet.

This bite is especially great because it involves no cooking, doesn’t require a recipe, and delivers when it comes to flavor.

At the forefront of this appetizer is smoked salmon.  I like to use pepper crusted salmon by Rushing Waters, a local company.  They are a great source for fresh trout, but also make smoked fish and spreads.

Ingredients

To make this, you will need the following:

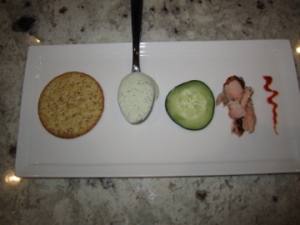
  • Handful of fresh herbs (I like to use dill, cilantro, and parsley)
  • Softened cream cheese
  • Dash of Milk
  • Crackers
  • Cucumber Slices
  • Smoked Salmon
  • Sriracha or other hot sauce

I start this by adding the cream cheese, herbs, and a little milk to a food processor.  Process this until the herbs are chopped.  The mixture should thin enough to easily dollop, but thick enough to hold itself on the cracker.  This can be done in advance and the easy assembly can be done before serving.  Perhaps the perfect task for the early party guest that is eager to help in the kitchen.

To put these together, I top the crackers with the cream cheese mixture and place a cucumber slice on each cracker.  After that, add some smoked salmon to each piece and finish with a little squirt of Sriracha.  I think these would be great garnished with sesame seeds as well.  If you want to lighten this up, you can even omit the cracker and use the cucumber as base.

I hope this party bite tip finds you well and that everyone has a very Happy New Year!

As always, cheers!

Crazy Brocco-Flower, a Cookie Sale, & the return of Coconut Peas

My blog has unfortunately been on a bit of a hiatus lately, but I had some things to share with you, so here goes.  On a bright note, now I know what my new year’s resolution will be: Blog more!

Romanesco

Romanesco: Silly Look, Serious Taste

Let’s start with the first.  If you have never seen a cauliflower or broccoli like the one here (sources seem to refer to it as both Roman cauliflower or Roman broccoli) then I would guess you are not alone.  This is the Romanesco variety and I think it is fabulous.  They do look more like something out of the Super Mario Brother’s garden than your local farmers field, but I think that is what makes them so much fun.

We recently had this for the first time while dining at Forequarter in Madison and I’ve had my eye out for it since.  These made an appearance at a local grocery store over the weekend, so I picked one up.

For my first try at cooking this, I divided this into florets and tossed them with olive oil, a grated garlic glove, some minced hot peppers, rosemary, and of course some salt and pepper.  I pan roasted these in an effort to save time, but would go with an oven roast at high heat for 20-30 minutes next time.  The conical shape made it difficult to char anything but the stems.  Despite being just a little underdone, I found the flavor to be delicious.  Of course, I had to finely grate on a little cheese before serving. I chose some Belavitano Gold for this and was very happy with that selection. I can’t wait to find another one of these so I can perfect the method.  Check out some shots from my romanesco cooking adventure.

Next item of business to share is information about the Milwaukee Foodies Bake Sale. If you are going to be in Milwaukee this weekend, you should check it out. Local bakers are donating cookies that will be sold to benefit the charity Cookies for Kids’ cancer. The sale is downtown at Best Place from 12p.m.-4p.m. Here is a link to more information: http://www.mkefoodies.com/2012/10/2012-mkefoodies-holiday-bake-sale.html

You may remember my award-winning Chewy White Chocolate Chip Gingerbread Cookies. I will be donating some for the sale! If you know anyone who might be interested in attending this, please do share the blog or forward the link above.

Milwaukee's Best Cookie 2011

Milwaukee’s Best Cookie 2011

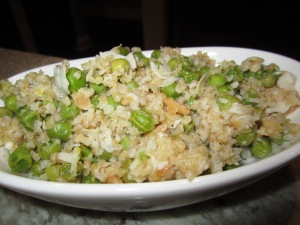
As promised, I had three things to share. The last must be prefaced with a quick childhood story. My signature dish from my childhood was what we called “Coconut Peas”. It was literally frozen peas and sweetened coconut. My family pretended to like it, but it is now something we joke about.  Well, tonight they made a reappearance of sorts.  I was trying out a green curry spice rub from World Market on a flat iron steak and needed a quick side dish.  With no fresh vegetables in sight, I grabbed some frozen peas and threw together the following in a saucepan.

The New Coconut Peas

The New Coconut Peas

  • Bulgur cooked in chicken broth
  • Peas
  • A little lemon juice and zest
  • Drizzle of garlic olive oil
  • Dash of half and half
  • Chopped Marcona Almonds
  • Flaked Unsweetened Coconut 
  • Salt and Pepper (of course)

The verdict: This was pretty tasty and paired great with the green curry beef. Maybe I was on to something back in the 80s…

Thanks for reading and hope this inspires you to cook something new or buy some cookies for a good cause.  Cheers!

The New Broccoli and Cheese

Image
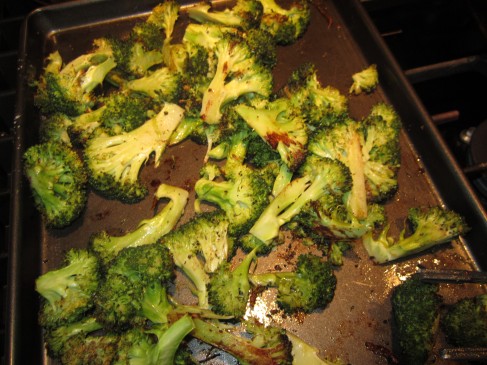
Growing up, I recall broccoli with cheese sauce being a very popular side dish.  I am sure it is still a favorite in some circles, but it’s not something I’ve had for ages.  I’ve been roasting my broccoli lately and I don’t think I will ever go back.  Today I am sharing a technique, not a recipe…and really just want everyone to know how wonderful a modest stalk of broccoli can be when it is given a little gourmet treatment.

Basic Roasted Broccoli

  • Broccoli
  • Good Olive Oil
  • Salt
  • Pepper
  • Some flair of your choice (some of my favorites below)
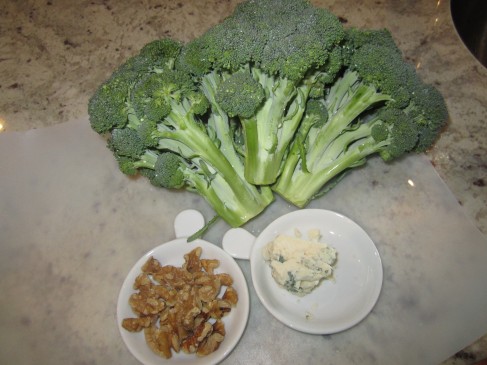
    Walnuts/Blue Cheese/Garlic (definitely my #1)
    Parmesan & a drizzle of truffle oil
    Red chile paste and lemon
    Bacon and Feta

Image

Preheat oven to 425 degrees.  Rinse broccoli and dry well.  Cut into pieces (best described as two-bite sections).  The stalks can be tough, so if I have plenty or if this is for company, I will trim most of the stalk off.  But, when it’s just my husband and myself, a little chewiness doesn’t bother us.

Toss the broccoli with olive oil and season well with salt and pepper.  Go with a light drizzle when you’re feeling healthy, but ramp it up a bit when you’re feeling like splurging. This works great with herb or garlic infused oils too.  Roast for ten minutes.  Flip the broccoli pieces and return to oven.  Roast for about ten minutes more.  Your florets should be starting to brown and crisp.  Remove from oven and toss with cheese, nuts, etc.  If I start with raw nuts, I usually just chop those and add them during the flipping step.

I know that roasting broccoli may not be new to many of you, but it is just sooooo good that I had to make sure all my followers are in the loop.  It takes a frugal vegetable and turns it into a foodie worthy side with little effort.  I will admit that my current obsession with roasted broccoli started with a fondness for roasted broccolini, but with plain old broccoli being much easier on the wallet, I’ve found myself making the latter much more often.

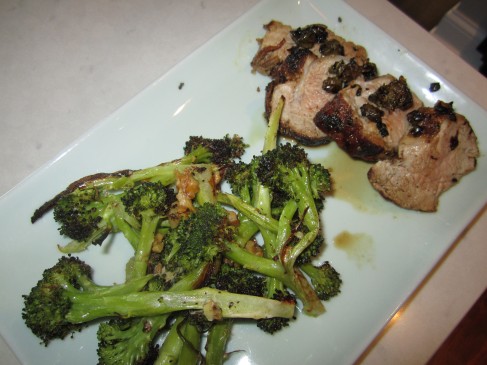
This is so versatile, I don’t think I need to make a protein recommendation, but here’s a shot of variation #1 with a lemon and caper topped pork tenderloin.  Cheers!
Image

I’ve Gone Crackers!

It’s crazy to think I haven’t blogged for months, but I’m breaking the hiatus with these healthy, homemade crackers.  I enjoy the brand Mary’s Gone Crackers and came across a few different copycat recipes online and decided to create my own version, heavy on the sesame.  Making homemade crackers is also very satisfying, especially if you already happen to have all the ingredients required as I did! From my research, soy sauce is not technically gluten free unless labeled as such, but if you do use a gluten-free soy sauce, the crackers will also be gluten free if that is a concern.

Sesame Power Crisps (Makes 60 small crackers)

  • 1/2 cup whole grain parboiled brown rice (like Uncle Ben’s)
  • 1/2 cup quinoa
  • 1/4 teaspoon dried herb de provence (optional)
  • 1/4 teaspoon kosher salt
  • 3 tablespoons flax seed
  • 2 tablespoons raw sesame seeds
  • 2 tablespoons black sesame seeds
  • 2 tablespoons soy sauce
  • 2 t. water
  • 1/4 t. table salt and pepper
  • sesame oil

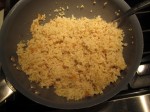
Preheat oven to 350 degrees.  Bring 2 cups of water to a boil.  Stir in kosher salt, herbs, rice, and quinoa.  Reduce heat to low and cover.  Cook for 30 minutes, then remove from heat for 5 minutes before proceeding.

In the meantime, let seeds toast in oven for 6-8 minutes.

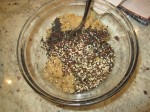
Place 2 t. water in food processor fitted with metal blade.  Add rice/quinoa picture and process until a paste forms.  Add soy sauce and continue to process until combined.  Transfer mixture to a bowl and stir in seeds, salt, and a few turns of pepper from a mill.  Stir mixture until seeds are fully integrated.  The mixture will be very sticky and thick.

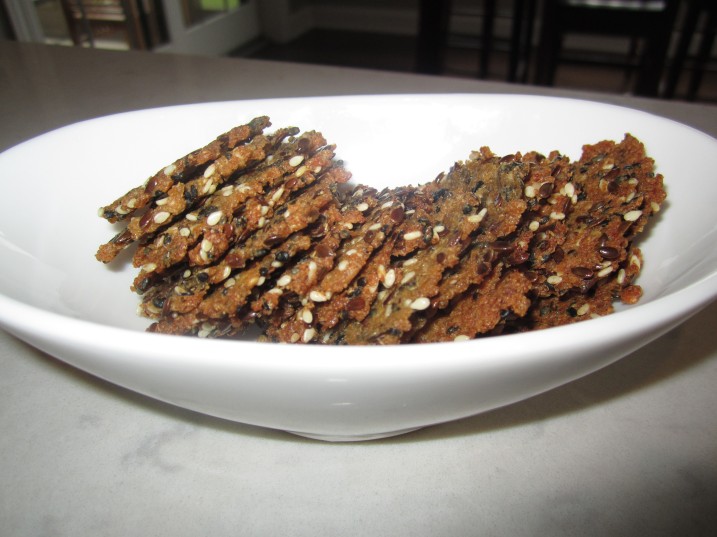
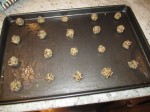
Coat a dark, non-stick sheet pan with sesame oil.  Make teaspoon sized balls of the dough mixture and place on pan. You will need to then flatten the balls as much as possible.  I used a metal measuring cup lightly coated with cooking spray (you will need to add more spray regularly).  The flatter the dough, the more crispy the end product will be.  (I think I could probably come up with a better technique for the flattening in the future, but this worked out ok as you will see.)

Bake crackers until golden brown throughout and dark golden brown at edges. This took 18-22 minutes depending on the batch.  Enjoy!  Impress your friends by sharing your homemade crackers if you don’t eat them all yourself!

What’s New in the Kitchen

I suppose this post would have been more appropriate to start the New Year, but it still feels like 2012 has just begun. Since Christmas, I’ve acquired a short list of new things for the kitchen; ALL of which I am very excited to share with you.

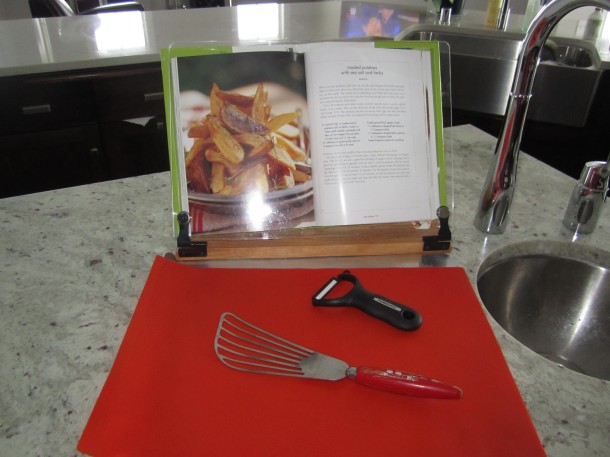
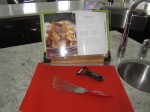
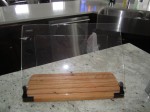
The first item is this cookbook stand given to me by my mother for Christmas. Thanks mom!! It is truly awesome. Who knew I’d be so excited about a cookbook holder, but if your cookbooks and magazines tend to look like they’ve gone through a food war after you cook, you need this too!

This one is made by Clear Solutions and I guess it was rated #1 by Cook’s Illustrated Magazine.  A clear cover goes over your pages to protect them from splatter.  It also folds for easy storage, which is a definite plus.

The second is a ceramic Y-Peeler.  Why did it take me so long to buy a Y-Peeler?  This makes peeling large items so much easier than the traditional designed peeler and I personally prefer it for peeling just about every vegetable I’ve tried so far…cucumbers, carrots, potatoes, squash…I am a big fan of the Y-Peeler.  Plus, the sharp ceramic blade lets me put it through the dishwasher without fear of dulling.

Next up is a stainless steel slotted spatula. Mine is a vintage find from my mom’s kitchen. Apparently she hadn’t been using it, but I love it so much that I feel bad that I’ve taken it from her. From carefully turning eggs to removing cookies from the cookie sheet, this is another item I can’t believe I waited so long to add to my kitchen.

Speaking of cookies, I finally bought a silicone baking mat.  I was gifted a larger silicone mat a few years ago and love it for rolling out dough, but it is too large for any of my baking sheets.  This one was under $10 from Nordic Ware and I’m loving it.  My addiction to parchment paper has been curbed in favor of baking with this mat.

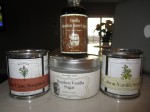
And finally!  This one is more of a fun gift for myself than a kitchen essential, but I was very excited when it came in the mail on Wednesday. Bobby Flay recommended I buy this on Open Sky and it’s called “Bobby’s Bourbon Barrel Baking Bundle”.   (I say that jokingly.  If you aren’t familiar with the site, you sign up for free membership and receive regular e-mails stating that different celebrities have shared a product with you.)  The bundle contains regular sorghum, vanilla bourbon sorghum, bourbon barrel vanilla, and a bourbon vanilla sugar.  If you’re not familiar with sorghum, it is a natural sweetener more commonly used in the south.  I had never used it before, but it had been popping up in my latest food magazines and I figured I better have some on hand. I used the bourbon vanilla sorghum in some chocolate chip pecan cookies this week and they were fantastic!

Well that’s what is new here. I guess I’ll get cooking!

Soup Like an Egyptian

The February issue of Food & Wine featured a recipe for an Egyptian Red Lentil soup that I decided to try due to having most ingredients listed on hand. It’s also healthy, so it seemed an appropriate choice for a post just after the new year when many people are trying to eat better.

I actually followed the recipe pretty closely at the beginning, but strayed towards the end. I didn’t have the right chile powder or fresh tomatoes, so I subbed in medium chile powder and canned tomatoes.  I also felt the soup lacked a little depth at the end, which is where the lemon zest and tomato paste came in.  Here’s my adapted version. The soup keeps well, so it’s a great one to make on a Sunday and plan to keep eating it during the week.  I served it with whole wheat pita slices and homemade hummus.  Regretfully, I didn’t pay much attention to the proportions on this batch of hummus and of course it turned out to be fantastic.  I wish I could share that one with you as well.

Egyptian Red Lentil Soup (Adapted from Food & Wine Feb. 2012) 8 servings

  • 2 tablespoons butter
  • 1 small yellow onion, chopped
  • 1/2 of medium red onion, chopped
  • 2 medium-sized carrots, chopped
  • 3 celery stalks, chopped
  • 3 medium-sized garlic cloves, sliced
  • 1 teaspoon ground cumin
  • 1/2 teaspoon ground coriander
  • 1/2 teaspoon of chile powder (medium spice)
  • 14.5 oz. can fire-roasted chopped tomatoes (do not drain)
  • 2 cups red lentils
  • 8 cups water
  • Finely grated zest from one lemon
  • 2 tablespoons tomato paste
  • Greek Yogurt (for garnish)
  • Cilantro (for garnish)

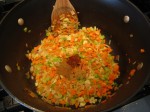
Melt butter in a large pot over medium heat.  Add in the onions, carrots, celery, and garlic and cook for about 5 minutes.  Add in the dried spices and cook for about three more minutes.  Add the tomatoes, lentils, and 8 cups of water and let simmer for 25-30 minutes.  The lentils should be very soft.  Stir in the lemon zest and tomato paste and then season with salt and pepper.  Puree the soup.  Serve with yogurt and cilantro. (I served the first serving as pictured, but then decided to run the yogurt through the blender with cilantro and lemon juice for an easy garnish for the rest of the week.)

This slightly spicy and zesty soup is a great winter warmer that’s hearty without being heavy.

A Salad Fit for the Cookie Monster

While browsing a recent issue of House Beautiful magazine, I came across a recipe for a Tuscan kale salad topped with pears and amaretti cookies.  Cookies? On a salad? I laughed a little and thought it sounded like something the new Cookie Monster might concoct.  I’m not sure if you’ve heard, but apparently in recent years they’ve given him a bit of a “healthy makeover” (as you can read more about in this article).

Intrigued by the salad, I set out to make it. After picking up the cookies at World Market, I headed to the grocery store. Unfortunately, only the more ordinary curly kale was available, but I decided to proceed anyway.  I adjusted the proportions slightly, but here’s my adapted version for two people as a generous side salad portion.

Kale Salad with Pears, Pecorino, & Amaretti

  • 4 oz. Kale
  • 1/2 of an anjou pear, shaved or very thinly sliced
  • 4 amaretti cookies, crushed
  • 1 tablespoon good olive oil
  • 1 tablespoon balsamic vinegar
  • Grated Pecorino Romano, Salt, & Pepper

Rinse and dry kale.  Remove stems and tear into pieces.  Then, place into salad bowl.  Top with pears and cookie crumbs.  Add oil and vinegar and toss very well so all leaves are coated.  Grate cheese onto salad (I used my microplane grater and covered the bowl with a thin layer) and season with salt and pepper.

This slideshow requires JavaScript.

We thought it was really good and easy!  Plus, it’s something different, which is always a plus.  I will look forward to trying this again when I can find the recommended Tuscan kale.

I’m not a chef, but I might play one on Christmas Eve

While working on dinner for our Christmas celebration, a guest I had just met stood in the kitchen.  She observed my efforts for a few minutes and then asked, “Are you a professional chef?”  Of course, I laughed and dismissed the comment, but I was flattered and thought “wow, I must really look like I know what I’m doing.”  And speaking of knowing what you’re doing, I thought this funny anecdote would be the perfect segue for discussing my thoughts on planning in the kitchen.

While casual meals can be thrown together, if it’s a special occasion meal I’m making, I am definitely going to sit down in advance and come up with a plan.  My strategy is usually this.  Three to four days before the meal I will evaluate the menu and determine what items can be made days in advance.  From there, I will make a note of anything to be done the night before.  For the day of, I start by making a note at the very bottom of the page with the time the meal is to be served.  Then, I make a list of all prep work left to do that can be done in advance of starting the true meal preparation.  I then go back to my goal serving time and work backwards.

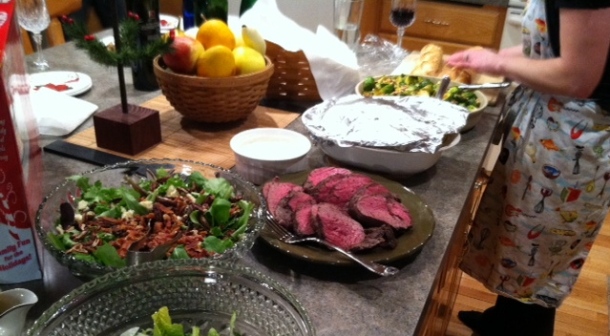
Here is example of our plan based on our Christmas Eve Dinner.  I was not alone in the kitchen, so the schedule takes that into account.  Obviously, when you’re going it alone, you’ll want to be more generous with giving yourself time to complete different tasks.

The Real Day Of Plan Document

MENU
Assorted Cheeses and Charcuterie
Prosciutto and Basil Wrapped Shrimp with Red Pepper Aioli
Baby Lettuces with Pears, Pecans, & Blue Cheese with Champagne Vinaigrette
Herb Rubbed Beef Tenderloin
Roast Brussels Sprouts with Walnuts and Brown Butter
Parmesan and Truffle Mashed Potatoes
Ice Cream Filled Yule Log

Planning Outline
Items to make 2 Days In Advance
Yule Log – Champagne Vinaigrette – Red Pepper Aioli
Day Before
Season Meat – Transfer Frozen Shrimp to Thaw in Refrigerator
Day of Task List
– Slice brussels sprouts and prepare in pan for roasting
– Roast Bacon
– Toast Pecans and Walnuts
– Wrap Shrimp and place on roasting pan
– Make Horseradish Sauce
– Grate cheese for Potatoes
– Discuss/Gather serving dishes for all items

Timeline
– 3:00 Prepare cheese and meat plates
– 3:30 Take meat out of refrigerator to bring to room temperature
– 3:45 Peel potatoes and place on stove in water
– 4:00 Pre-heat main oven to 500 degrees
– 4:15 Start boiling potatoes & pre-heat second oven to 400 degrees
– 4:30 Put meat in oven; remove when temperature reaches 125 and let rest until ready to carve
– 4:40 Reduce main oven temperature to 375 degrees
– 4:45 Run potatoes through food mill/prepare mash
– 5:00 Roast Shrimp in second oven; reduce oven temp and use for keeping potatoes warm
– 5:30 Roast Sprouts- make browned butter while roasting
– 5:45 Prepare Salad & Carve Meat
Serve dinner around 6 o’clock!

I do advise reviewing the plan after the meal and making notes (at least mentally) of anything you may do differently in the future.  For example…running 5 pounds of potatoes through a food mill took longer than I thought, but overall the dinner was a success.

If this sounds like too much work, trust me, it’s worth it.  You’ll create a wonderful meal for your guests and will be able to have more fun while doing it.  You don’t have to look at the schedule as being super rigid, but more as something to keep you from forgetting what to do next.

I suppose I should wrap this up, but I have a few menu planning comments to add. While these may seem obvious, it is easy to feel overly ambitious after browsing recipes.

  • Know your limitations and those of your kitchen itself
    If you only have one oven, don’t overextend its use.
    And if you have two ovens, take advantage of it and use one for holding/warming items before serving.
    Don’t pick multiple menu items that need to be cooked just before serving or that require other tedious preparation at the last minute.  The more things you can make ahead, the more fun you’ll actually get to have during the party.
  • If practical, test out new recipes in advance and if you can’t test them, pick only recipes you feel confident making.
  • If your guests insist on bringing something…let them!  BUT suggest what it is they should bring, so you’re not in for a surprise.  I like to do shopping in advance, so fresh bread is always one item that is great to have picked up on the way over.

Hope that was helpful.  I’ve got to go, I need to work on my NYE plan. 🙂
Cheers!